Monday, December 21, 2009

My Favorite Blogs to Follow

Although I am not the most consistent blogger myself (a probable New Year's Resolution), there are several blogs that I read more often than any others:

http://www.keepinghistory.blogspot.com/ is my older sister's blog.  She lives on the Isle of Anglesey, a part of Wales, England.  She has 3 adorable little boys and now a brand new little girl.  I have been over to visit her twice in the last 3 years, but that is not near frequent enough!  I love going online to read her narratives and see the photographs of my little nephews growing up.  She is an amazing mother and sister!

http://www.themcintyrefamily.blogspot.com/ is one of my mission companion's blogs.  We were a dynamite pair as missionaries, but since our days in El Salvador, we have never lived in the same state.  When she was in Utah, I was in San Francisco; when I was in New Jersey, she was in Houston; and now that I am in Utah, she will be heading to another state for her husband's medical residency.  I am thankful that I can still partake in some of her life's daily adventures through her blog.

http://www.amaviaggiare.blogspot.com/ is my old roomate's blog.  We lived in the same household on Treasure Island, San Francisco.  But she recently moved to Italy, where she is teaching English and discovering life abroad.  I love seeing the beautiful pictures of Florence and the surrounding area; traveling vicariously!  Thanks Liz!

http://www.progressivepioneer.com/ is the blog for an aquaintance/friend I met while living in San Francisco.  Several years ago she married, moved to the Salt Lake City area, and began living her dream.  Her blog tracks her life, her lifestyle, as well as many useful tips and fun giveaways for a healthy and self-sufficient lifestyle.  This week's giveaway is DoTerra's Dr. Mom Essential Oils Kit. The following link will take you into her world:


Tuesday, October 27, 2009

Recipe Diaries: 100% Whole Grain Bread Never Tasted SOOO Good

Although I have enjoyed baking bread for many years, I have always used a combination of Whole Grain Flour with White Flour in order to avoid a dense loaf.  My-Oh-My how the world has changed!  I was first introduced to Peter Reinhart's Whole Grain Breads about 3 months ago, from a friend's blog http://www.progressivepioneer.com/.  Almost immediately I checked out the book from the library, and I have been testing bread recipes ever since--totally addicted to the idea of Whole Grain loafs that act like white flour loafs.  And guess what...it really works! So I wanted to pass the good news along...

I highly recommend the book, because I won't be able to explain everything in perfect detail on this blog.  And you'll learn all kinds of interesting facts about bread science, the anatomy of a wheat kernel, wild yeast, and enzymes.  However, because so many of my friends and family have asked...How Did You Do It?  Here's a quick run down...from Wheat to Eat.

I grind my own wheat into flour using the Grain Mill (Stand Mixer) Attachment to the KitchenAid.  By far my favorite attachment (ok, my only attachment thus far).  Using the Grain Mill, I can either crack the wheat for a delicious breakfast cereal, or in this case, grind it into a fine powder perfect for bread making.

Reinhart's recipe does require that I plan ahead; that's the whole secret behind delayed fermentation.  The night before I want to consume a delicious loaf of whole grain bread, I create what's called a Soaker as well as a Biga.

Day 1:  The Soaker consists of whole wheat flour, salt, and my delicious homemade yogurt (milk or buttermilk may be used instead)
After mixing the soaker ingredients together, I cover loosely with plastic wrap and leave at room temperature for 12 to 24 hours.
Day 1: The Biga consists of whole wheat flour, instant yeast, and filtered water.  Also mixed, covered tightly with plastic wrap, and put into the refrigerator overnight.  Then, in the morning removed from the refrigerator approximately 2 hours before mixing the final dough, to take off the chill.

Day 2:   I use a metal pastry scraper to chop both the Soaker and the Biga into smaller pieces, ready for use in the final dough
Day 2: The Final Dough consists of the Soaker, the Biga, additional whole wheat flour, salt, instant yeast, honey or agave and unsalted butter, melted
After mixing...
Do a little more kneading...
Then place it in a bowl to rise.
Transfer to lightly floured work surface
Shape the loaf
Transfer to Pan
Let rise again
Finally Bake, using a Steam Pan (optional)
Let cool, before serving....if you can :)
100% Whole Grain Bread Never Tasted, Nor Looked, SOOO Good!

Monday, October 5, 2009

Recipe Diaries: Want to Salsa?

My first attempt at canning salsa, and I'm already addicted to the savory dish.  I will need to start stocking tortilla chips, something that has never been a regular on my grocery list before now. 

A novice salsa canner, I chose to start out small, canning only 8 pint jars.  I chose a recipe of Guatemalan descent--perfect to satiate my love for Latin American foods--a love developed while living 18 months in El Salvador at the turn of the millenium. 

The key to great salsa is Roma Tomatoes.  I bought my Roma's at one of the season's last Farmer's Markets at Thanksgiving Point.  Roma's are less watery than other varieties, and therefore yield a thicker, more savory sauce.
 
The Salsa Recipe is as follows:  10 Roma Tomatoes (whole), 5 Tomatillos (whole), 1-2 Serrano Peppers (whole but w/out stems), 1/2 bunch Cilantro, 3-4 Garlic Cloves, 1 Onion (chopped), Lawry's Seasong Salt, and lime juice

The Tomatillos are optional, they add a slighlty acidic flavor to the salsa.
Serrano Peppers are preferred over Anaheim Peppers because their flavor is stronger, mas fuerte!  No worries if you prefer mild salsa, the peppers are stewed whole, taken out before blending, then put back in, one at a time, until desired level of 'Hotness' is achieved.  Definately customizable.  But don't forget to stew them whole, first.

I placed all the ingredients into a large enamel pot, with 1/4 cup water.  Then Boiled for 45 minutes, stirring frequently.
Now that all the vegetables are mushy, I removed the serrano peppers, then blended the mixture into a fine puree of salsa.  (I didn't have a hand mixer I could put into the pot, so I used my Hamilton Beach Food Processor; I assume a blender could also be used....but gets very messy and tedious).  I added the serrano peppers, one-at-a-time, to taste.  Added Lawry's Seasoning Salt, to taste. And finally poured my salsa into pint jars.  Once in the jars, I added 3 Tablespoons of freshly-sqeezed lime juice to each jar.

The secret to juicing a lime is simple.  First, roll the lime around on the countertop with lots of pressure from your hand.  Second, cut the lime in half.  Third, nuke it in the microwave for 5-10 seconds, or until the juice is easily squeezed out.

I capped my jars w/lids and rings, immersed  them into the water bath, and boiled for an additional 20 minutes. (the water should be only lukewarm when the jars are immersed, so as not to crack the glass....and don't start timing the 20 minutes until after the water starts to boil)
 
And....voila!  Delicious, Savory, Healthy, Latin-American Salsa for my pantry.

Thursday, September 24, 2009

Exploring Utah: Timpooneke Trail & Scout Falls

One of the most fantastic reasons for living in Utah is the immediate proximity of the Wasatch & Uinta Mountains. Growing up in Idaho, my family made frequent visits to Salt Lake and the surrounding area; always driving around and through the mountains, hearing the stories of ancient Bonneville Lake as well as of the pioneer settlers. In early July, when Dave and I made the trek from New Jersey (in moving truck and car, rather than oxen and cart) the most magnificent scenery was the final stretch of Route-80 from Wyoming, around Park City, and into the setting sun over the Salt Lake Valley. In that moment, I knew that I had arrived at one of the most beautiful destinations of the world. I could hardly wait for my opportunity to really get out and explore the scenic wonders of this portion of the Rockies.

To my delight, my mother-in-law graciously invited me to tag-along her already organized weekly hikes with a small group of friends. Thus far I have been up Days Fork, Red Pine Lake, Cecret Lake, and yesterday explored the beginnings of Timpooneke Trail--the summit of which is Timpanogos. I remembered to bring my camera and was able to capture the very beginnings of autumn.

Early on in the hike I noticed twin falls way up in the distance. The falls were also visible in the photograph above, however, if you don't know exatly what you're looking for, you'll miss it.

I found myself pondering over human's nature--both physical and spiritual--to be drawn toward water and light.

Exquisite white-colored berries, my favorite find

Just when the sun was peaking over the mountain

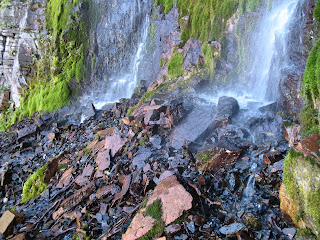
We crossed over several small waterfalls along the way


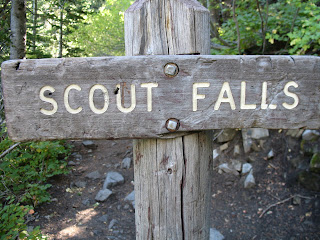
We did some exploring after encountering a sign for Scout Falls


Look close, you can see Michelle walking alongside the cliff


The view from the falls was, well, literally breathtaking

Wednesday, September 23, 2009

Recipe Diaries: Millions of Peaches, Peaches for Free

Ok, so maybe not millions of peaches, but definitely peaches for free. My adorable and supportive husband spent his entire Saturday afternoon on a ladder, picking all of the peaches from Grandma MariLou's Garden. He was the sole peach picker, because I had abandoned him for a weekend excursion to Idaho (to finish crafting a solid wood headboard in my Dad's shop-of which I will post pictures, later on this week) and his father had also abandoned him (and Grandma for that matter) for an important excursion to Phoenix in celebration of another grandparent's 60th wedding anniversay. Despite my abandonment, Grandma MariLou still gifted us a large bag of home grown peaches. yum, yum.

I found this the perfect opportunity to put some of Mom's Life Lessons into practice, and to Can Peaches on my own for the first time.

First, I scrubbed the peaches clean. Then, on the stove, I started the creation of a honey-water syrup (instead of sugar, because I'm trying to get away from refined sugars)

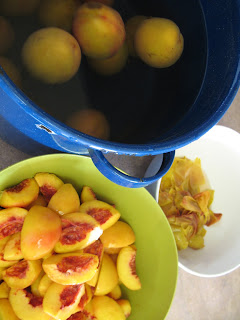
Blanched the Peaches

Poured them into an Ice-Water Bath

Peeled, then Sliced the Peaches

Poured my Honey Syrup Creation into the Jars


Added the Sliced Peaches

Boiled them in the Hot Water Bath for 40 Minutes

And now have some delicious, home-canned peaches for the winter months ahead.
Related Posts with Thumbnails